Growing Sweet Peas – Starting Early Indoors And Transplanting: Technique Tips With Photos
When To Start: In cold winter areas, sow in seed starting containers in early spring about 6-7 weeks before the last frost date, then plant out as soon as soil can be worked; sweet peas can handle light frosts.
In mild winter climates, where the ground does not freeze, sweet pea seeds can be fall-sown directly into the garden from September through November to grow strong root systems and then bloom in spring.
But if you don't get your sweet peas planted in fall, you can still get a nice crop, although a little later to bloom, if you give your seeds a head start by sowing indoors in seed containers in late January thru March to transplant into the garden as soon as soil can be worked; sweet peas can handle light frosts.
Click on photos for larger view
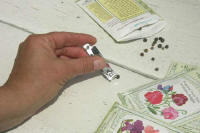
1. You may choose to nick your sweet pea seeds before planting. Nicking the seed with a nail clipper breaks the outer coat of the seed so it can absorb water immediately. By doing this a larger percentage of your seeds will germinate and they will sprout a few days earlier.
Here's how: Hold a seed between your thumb and forefinger. With the other hand, hold the clippers at an angle so that you use one end of the blade, then clip your seed. Your goal is to make a slice through the brown top coat of the seed, not to take a chunk out. Sometimes you can barely see the nick you made and sometimes a piece of the seed coat cracks off and you see the lighter colored inner seed. Both are correct!
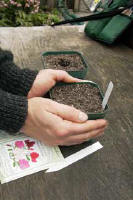
2. When planting sweet peas in containers, do not use garden soil. Instead, use a good quality potting mix. Potting mix recipes are formulated to perform in the conditions present in a small container, whereas using garden soil can result in problems such as compaction and poor drainage. Many soil mix brands are readily available at garden centers.
Always pre-moisten your potting mix before filling your container. In a bucket or wheelbarrow, slowly add water while mixing the soil to make it evenly moist. You are done when it feels as wet as a wrung out sponge.
A 3-4 in. pot is a good size for starting sweet peas. If you are re-using a pot, be sure to thoroughly clean it first to avoid transmitting disease to your new soil mix. Fill the pot with your pre-moistened mix and then lightly tap it on your work surface to settle the soil. The soil surface of a properly filled pot will be about 1 in. from the top of your container.
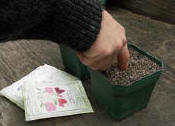
3. You are now ready to sow your seeds. How deep you plant them makes a difference. Always follow the planting depth instructions on the back of your packet. For sweet peas, make a 1 deep hole. Your finger or a pencil works well for this.
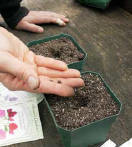
4. Drop your seed into the hole you made. We recommend sowing 2 seeds per pot so that, in the end, every pot has a plant even if one does not germinate or dies.
If you choose to sow 2 seeds per pot, you will need to thin to 1 seedling per pot after the first leaves have formed. Cut or pinch out the extra seedling at the soil line. Do not pull it out as this can disturb the roots of the remaining seedling.
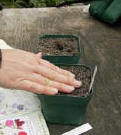
5. After sowing, cover your seed with soil mix. We recommend labeling your containers with the variety and date so you can keep track of what you planted and when.
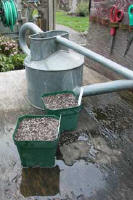
6. Gently water your covered seeds. Use a watering can or hose with an attachment that diffuses the water so that it sprinkles like a gentle rain. This will prevent the water from washing away the soil or causing too much soil compaction.
While waiting for your seedlings to emerge, provide the appropriate conditions for germination to take place. Water and temperature are the most important factors. Your soil should stay constantly moist, but not soggy. The soil temperature should be between 55-70 F. If the weather conditions permit, you can start your seeds outdoors. Otherwise you will need to start them inside your house or a greenhouse. If starting them outside, provide protection from birds, snails and slugs.
After your seeds have sprouted, you must provide them with a good source of light. Indoors you can place them by a window as long as they will not experience extreme heat from the sun during the day. Cooler night temperatures by a window are not a problem for sweet peas. You can also use fluorescent lights. However, plants should be about 6- 12 in. from the lights for the intensity to be bright enough.
7. If you started your seeds inside, you will need to harden off the seedlings before transplanting them into your garden. Hardening off means gradually acclimating your plants to the conditions they will encounter outside – direct sunlight and temperature being the most critical. If you do not do this, your seedlings may suffer transplant shock after you plant them into the garden.
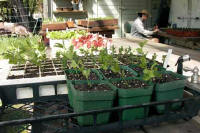
Start the process of hardening off when your plants have about 3-4 pairs of leaves. Move your plants to a location outside that gets direct morning sun and afternoon shade. If you do not have such a location, each day you will need to move your plants into the sun in the morning and out of the sun in the afternoon. After about 3-4 days move them to a spot where they will get direct sun all day. In a few more days you can transplant them into your garden.
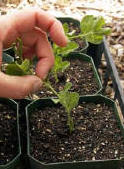
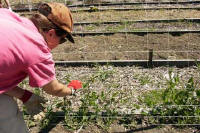
8. When your seedlings have 3-4 pairs of leaves, you can pinch or cut off the top of the seedling, leaving 2-3 pairs of leaves. You should make your cut just above a pair of leaves. Pinching gives you a fuller plant by promoting lateral branching.
9. Sweet peas need well-drained, fertile soil, so before planting add some aged manure or other finished compost into your garden bed, work it into the soil, and rake the bed to create a fairly level surface.
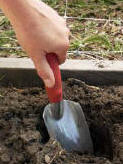
To transplant your seedling, dig a hole deep and wide enough to fit the root ball.
10. When removing your sweet pea seedlings from their container, avoid disturbing the roots as much as possible. Try this. To catch the root ball, put one hand over the top of the pot with the seedling between your fingers, then turn the pot over. With the other hand squeeze the sides of the pot and then gently tap the bottom until the plant and soil come out.
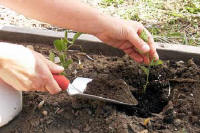
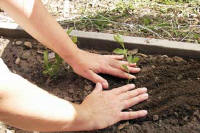
11. Place your seedling into the hole you dug and back fill it with soil. It is important that sweet peas are transplanted so that the soil level is the same as it was in the pot. If you bury too much of the stem, the plants may become diseased and stunted, perhaps even die.
12. Space your transplants 5-6 apart. Proper spacing between plants is critical for the health of your mature sweet peas. It improves air circulation to help prevent disease and gives the roots of individual plants enough space to forage for water and nutrients.
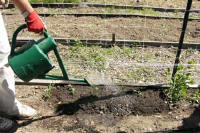
13. As soon as you are finished transplanting, gently water in your seedlings. This not only provides water to the plant, but also settles the garden soil around the root ball so there are not large pockets of air that can dry out roots. Use a watering can or a hose with an attachment that diffuses the water so that it sprinkles like a gentle rain--this will prevent the water from washing away the soil or battering your delicate seedlings.
Tall sweet peas need a well-anchored support to climb up. Erect one now so that it will be in place as soon as your seedlings are ready to start climbing.
14. It is critical to protect your sweet pea seedlings from birds, snails and slugs. This should be done right after sowing your seed, otherwise these common predators may find your sprouts and eat them before you even know they are up!
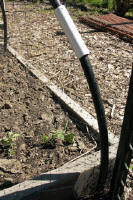
For birds, use netting. We make our own support hoops from flexible, black plastic irrigation tubing, commonly called polytube, and available at most good garden centers. Cut it in lengths appropriate for the width of your garden beds. Push the ends of the cut tubing into the soil to form arches over your sweet pea bed. Drape the bird netting over these arches and secure all edges, making sure there are no openings. Remove the netting before your sweet peas get tall enough to attach themselves to it. For snails and slugs, we like the product Sluggo because it is non-toxic to humans, pets and wildlife.
15. As your plants get taller and start to climb, you may want to help wayward branches find their vertical support system. Gently coax them onto your support. Sweet pea branches snap easily.
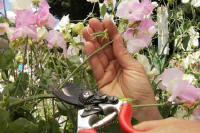
16. To keep your sweet pea plants blooming as long as possible, we recommend deadheading. This means cutting off spent flowers before they have a chance to divert energy towards making seeds instead of more flowers. The ideal time to deadhead is just after the bloom has peaked and is just beginning to fade. Always cut off the entire flower stem.
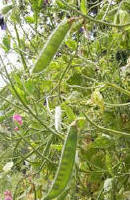
17. This plant has entirely finished blooming. As you can see, the spent flowers form seedpods and the plants slow down and then stop blooming altogether. Eventually, all sweet pea plants come to the end of their flowering life whether you deadhead or not, but you can prolong the bloom period by cutting off spent flowers.
18. Of course the whole point of growing sweet peas is the flowers. Don't forget to cut and bring them into the house regularly. They make beautiful, exquisitely scented bouquets. And the more flowers you cut, the more the plant will produce!
Click here to view and purchase our 28 varieties of Sweet Peas


